No items
in basket
Published: 14/05/2025
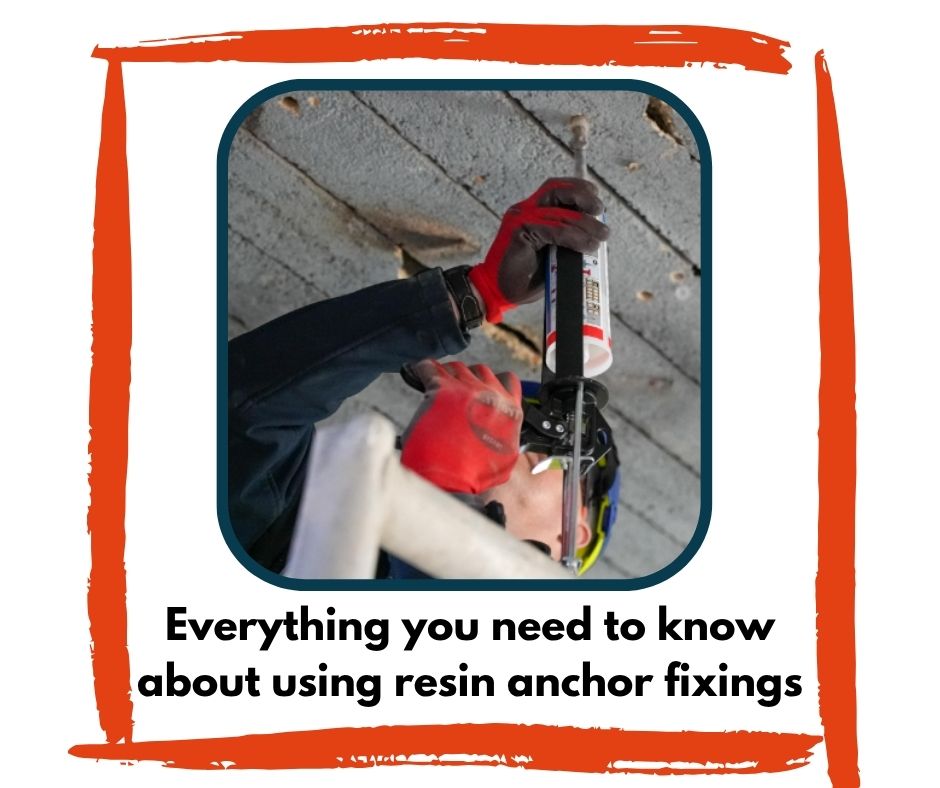
Screwing Into Concrete Using Resin Anchor Fixings
Screwing into Concrete Using Resin Anchor Fixings
When it comes to fixing into concrete, standard screws and plugs often just don’t cut it, especially when you're working with heavy loads, high-stress environments or structural applications. That’s where resin anchor fixings come in.
Ideal for tradespeople across construction, carpentry, metalwork and beyond, resin fixings provide a rock-solid hold in concrete, brick, stone, and other masonry materials. If you're not using resin anchors yet, you're missing out on one of the most reliable and versatile fixings on the market.
In this blog, we’ll walk you through everything you need to know about screwing into concrete using resin anchor fixings – from how they work to when and why you should be using them.
What Are Resin Anchor Fixings?
Resin anchor fixings – also known as chemical anchors – are a two-part bonding system made up of:
- A resin (usually epoxy or polyester)
- A hardener or catalyst
When mixed together and injected into a drilled hole, the resin chemically bonds with the concrete and the fixing element (such as a stud or threaded rod). Once cured, this creates a super-strong hold, stronger than many mechanical fixings.
Unlike expansion anchors, resin fixings don’t rely on force or friction. This makes them perfect for applications where cracking or damage to the base material must be avoided.
When Should You Use Resin Fixings?
Resin anchor fixings are especially useful in the following scenarios:
- Fixing into weak or cracked concrete
- Close-to-edge fixings (where expansion anchors could cause spalling)
- High-load structural fixings (e.g. beams, railings, structural steel)
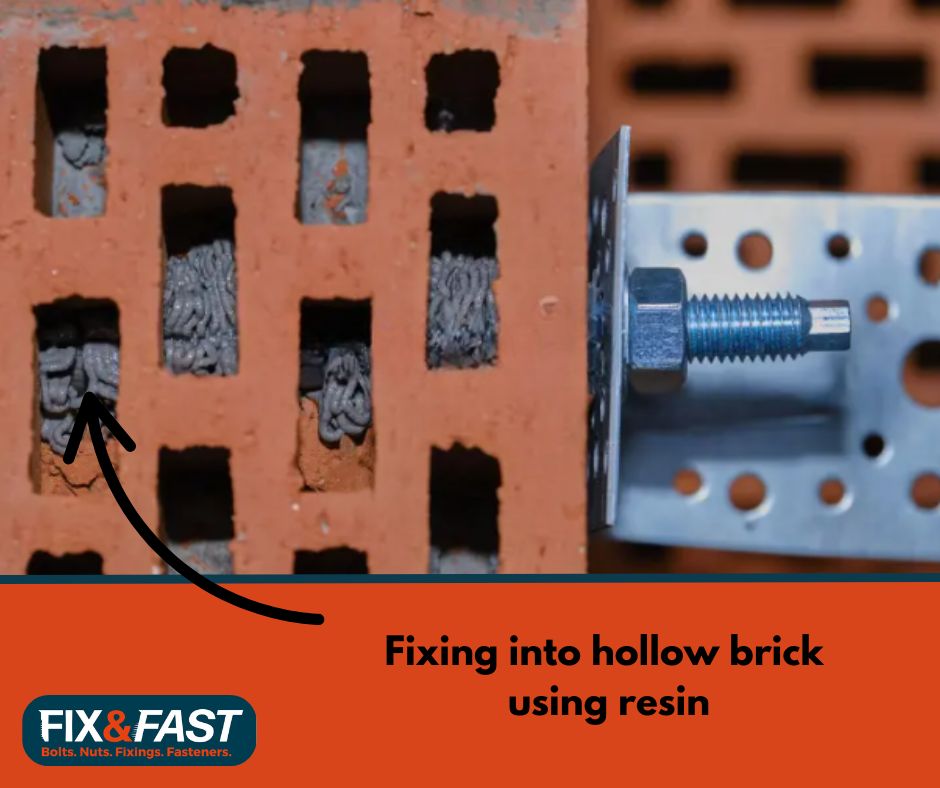
- Fixing into hollow block or brick (with a sleeve insert)
- Corrosion-sensitive environments (when used with stainless steel studs)
In short: when the job demands strength, stability and safety, resin is the way to go
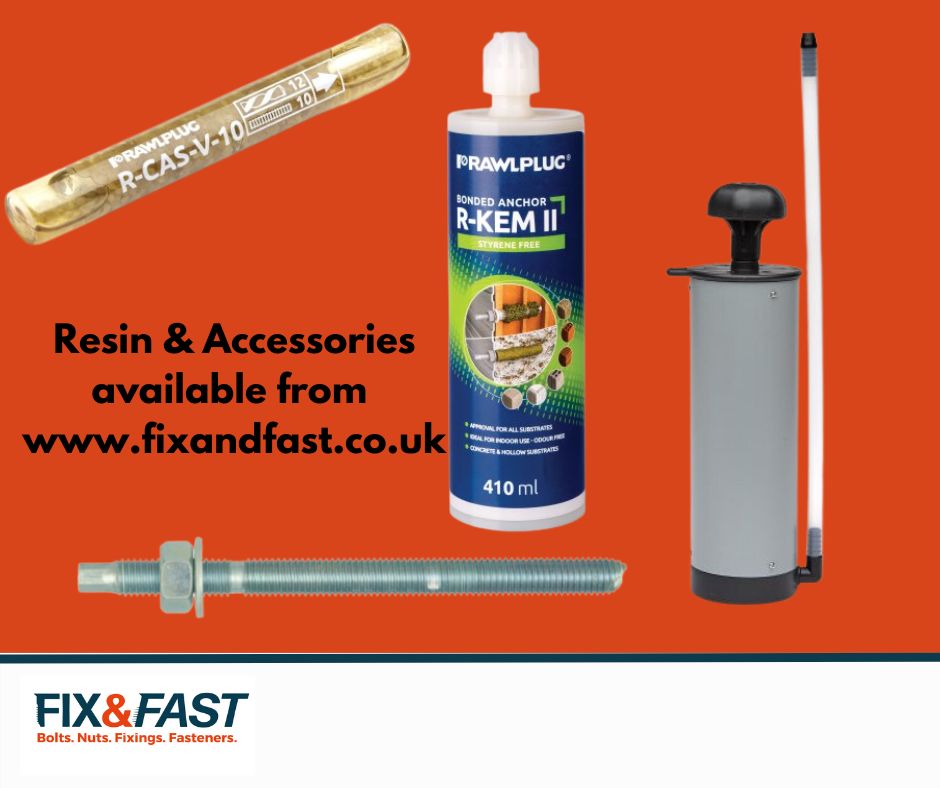
Tools & Materials You’ll Need
Before you get started, make sure you’ve got the following:
- Resin anchor cartridge (and applicator gun)
- Suitable anchor studs, rods or rebar
- Hole cleaning brush or blower pump
- Drills with applications for drilling into masonry and concrete
- Masking tape or marker
- Protective gloves and eyewear
Always read the manufacturer’s instructions, as curing times and installation steps may vary depending on the type of resin used
Step-by-Step Guide: How to Screw Into Concrete Using Resin Fixings
Here’s a simple guide to getting it right first time:
Step 1: Mark Your Fixing Point
Use a pencil or chalk to mark the exact location where the fixing is needed. Use a level if precision is important.
Step 2: Drill the Hole
Using a hammer drill and the correct diameter masonry bit, drill to the specified depth for your anchor rod. Typically, this is at least 10–15mm deeper than the length of the rod you’re inserting.
Pro Tip: Drill at a slow, steady speed and avoid overheating the bit. Let the drill do the work.
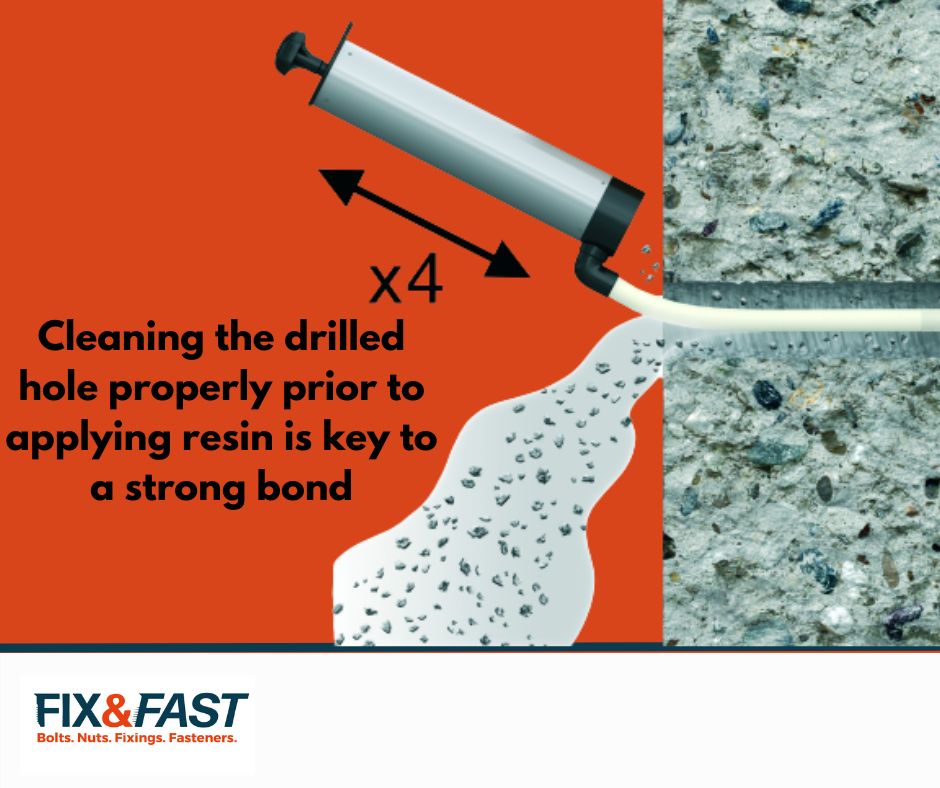
Step 3: Clean the Hole Thoroughly
This is a crucial part. Resin won’t bond properly to dust or debris.
- Blow out loose dust using a pump or compressed air
- Use a nylon cleaning brush to scrub the sides of the hole
- Blow out again to remove any residue
Repeat until the hole is spotless – this step is non-negotiable for proper adhesion.
Step 4: Prepare the Resin
Most resin fixings come in coaxial cartridges, which mix the resin and hardener as you apply. Insert the cartridge into a sealant gun and screw on the mixing nozzle.
Before injecting into the hole, squeeze out the first 10–15ml of resin onto scrap material – this ensures proper mixing.
Step 5: Inject the Resin
Insert the nozzle to the bottom of the hole and slowly fill it, withdrawing the nozzle as you go. This prevents air pockets and ensures even coverage.
Fill the hole about two-thirds full.
Step 6: Insert the Anchor Stud or Rod
Twist the threaded rod or stud slowly into the resin-filled hole until it reaches the base. Some resin may squeeze out, this is normal.
Do not move or disturb the fixing during the curing process.
Step 7: Allow to Cure
Check the product’s label for the correct curing time, which can vary depending on the material, temperature and humidity. This can range from 20 minutes to several hours.
Only apply load or torque to the fixing after full curing.
Advantages of Resin Anchor Fixings
- Exceptional Holding Power – Ideal for heavy-duty and structural applications
- No Expansion Stress – Makes them safe for close-to-edge fixing
- Chemical Resistance – Long-lasting even in harsh conditions
- Versatile – Works in solid concrete, brick, stone and hollow substrates (with sleeves)
Common Mistakes to Avoid
- Skipping hole cleaning – This leads to poor bonding and weakened fixings
- Using expired resin – Always check the shelf life before use
- Overfilling or underfilling holes – Follow manufacturer guidelines for volume
- Moving the stud before curing – Causes voids and weakens the fixing
Choosing the Right Resin & Fixings
When shopping for resin anchor fixings at Fix and Fast, consider the following:
- Application type – Structural, decorative or temporary?
- Environmental exposure – Choose epoxy for damp or aggressive conditions
- Load requirements – Check product data sheets for tensile and shear strength
- Substrate material – Solid concrete, hollow brick or stone?
You’ll also need to choose the appropriate stud material – galvanised or stainless steel are most common for long-term durability. If strength and safety are non-negotiable, resin wins every time.
Final Thoughts on Resin
Whether you’re installing a heavy-duty gate, securing a steel beam or mounting safety railings, resin anchor fixings offer unbeatable strength, reliability and versatility. While the process takes a bit more care than standard plugs and screws, the results are worth it – especially in high-load or high-stakes applications.
Ready to stock up? Contact us or shop our range of products to find all the accessories you need to get the job done right.
T: 01482 324 731
E: sales@fixandfast.co.uk

Thousands of Fixings & Fastenings
Delivered straight to your door

Free UK Delivery
On all orders over £50*

Same day dispatch
Order before 3pm Monday - Friday
We accept the following payment methods:

Opening Hours
Monday - Friday: 8am - 5pm
Saturday & Sunday: Closed
